
Yesterday I shared my son’s blue & aqua baptism brunch, and today I thought I’d show you how I made the little necktie bunting I used on the donut cake. In case you haven’t noticed I kind-of have a thing for little buntings on cakes, as evidenced by this rainbow cake with a Happy Birthday bunting, this simple washi tape bunting, and then this cute mini tissue tassel bunting. I like buntings because they’re usually pretty quick to make and they just add so much to a simple store-bought cake (or donut cake).


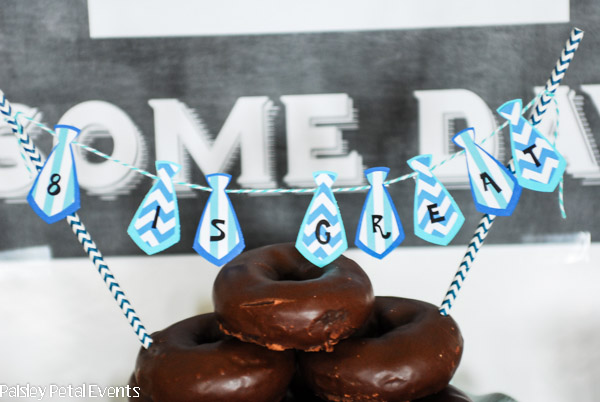
Logan loves chocolate donuts so I knew we’d be having a donut cake at our baptism brunch. I just embellished it with a mini necktie bunting, to dress it up a bit. You could use this for a little man birthday party or any boy themed party, really.

You only need a couple of things to create this banner: patterned paper, plain cardstock, straws (or bamboo skewers), twine and small letter stickers.

First I cut mini neckties out of colored cardstock about 2 1/4 inches long by 1 1/4 inches wide using my Silhouette machine. Then I cut out the smaller, patterned ties, which were about 2″ long by 1 inch wide. I used a glue stick to attached the 2 pieces together. If you don’t have a cutting machine, simply create a mini tie pattern and trace as many as you need for your bunting.

Use your stickers to spell out the saying for your bunting. Attach the neckties to your twine with tiny pieces of tape on the back. Tie the twine to your straws (or bamboo skewers) and insert into your cake or whatever else you want to embellish!

You’re done! A simple and easy way to dress up any cake or dessert for your next celebration!
So what about you?? Do you ever use little buntings or something similar to dress up store-bought items?? I’d love to hear in the comments below!
Thank you so much for your amazing DIY ideas!! I’m totally going to use these little bunting tutorials to decorate my diaper cakes!!! So on trend!!
Thanks so much for stopping by Laura!