• About
  • Submissions
  • Contact

Paper Crush

making life pretty with paper

  • 
  • 
  • 
  • 
  • 
  • 
  • Shop
  • Blog
  • Free Printables
    • St. Patrick’s Day
    • Spring/Easter
    • Birthday
    • School/Teachers
    • Summer
    • 4th of July
    • Calendars
    • Football
    • Halloween
    • Thanksgiving
    • Christmas
    • New Year’s
    • Valentine’s Day
  • HOLIDAYS
    • St. Patrick’s Day
    • Spring/Easter
    • Halloween
    • Thanksgiving
    • Christmas
    • New Years Eve
    • Valentine’s Day
  • PARTIES
    • 1st Birthday Party ideas
    • Boys Party ideas
    • Girls Party Ideas
    • Party Ideas
    • Featured Parties
    • Football/Superbowl
    • Wedding Inspiration
  • DIY PROJECTS
    • Crafts

How to Make Monster Marshmallow Pops

October 17, 2012 by [email protected] 4 Comments

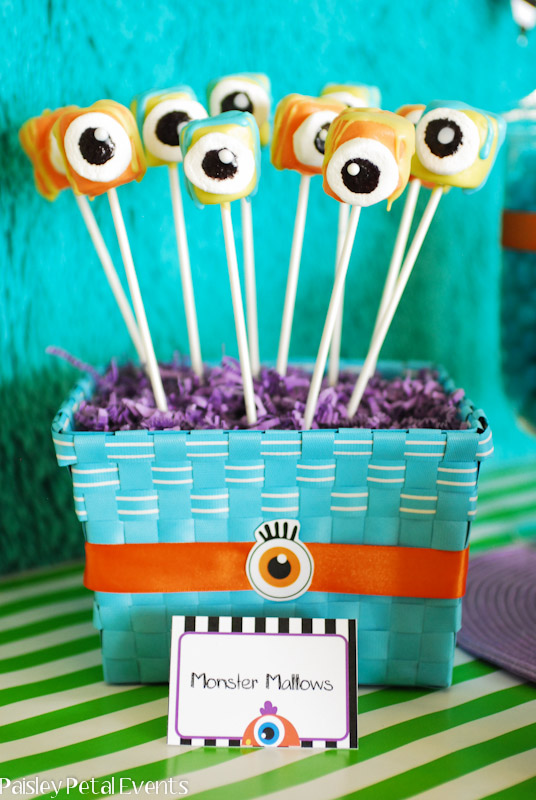
Last week I shared the fun Monster Mash party that I styled for Erika at Sour Punch Studio and I promised a tutorial on the spooky monster marshmallow pops so here you go! These would make such a fun treat at your upcoming Halloween party and my kids LOVED eating them!

Monster Marshmallow Eyes

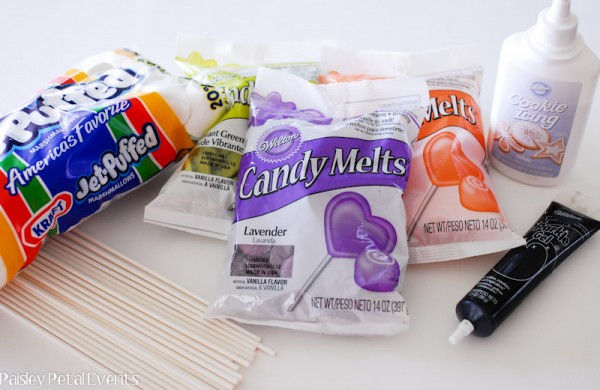
You will need the following supplies:

Large marshmallows

Candy Melts

6″ lollipop sticks

Black food gel

White icing

Monster Marshmallow Eyes

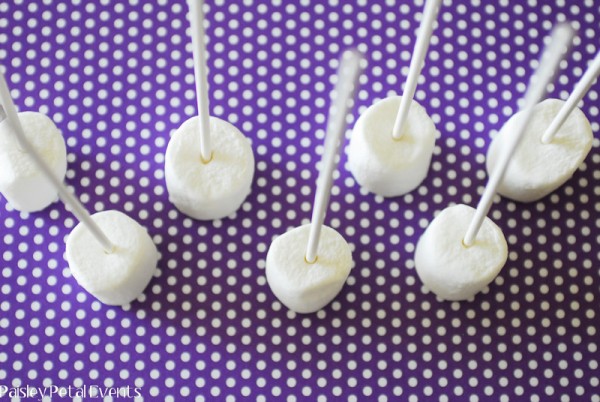
Step 1: Insert your lollipop sticks into your marshmallows.

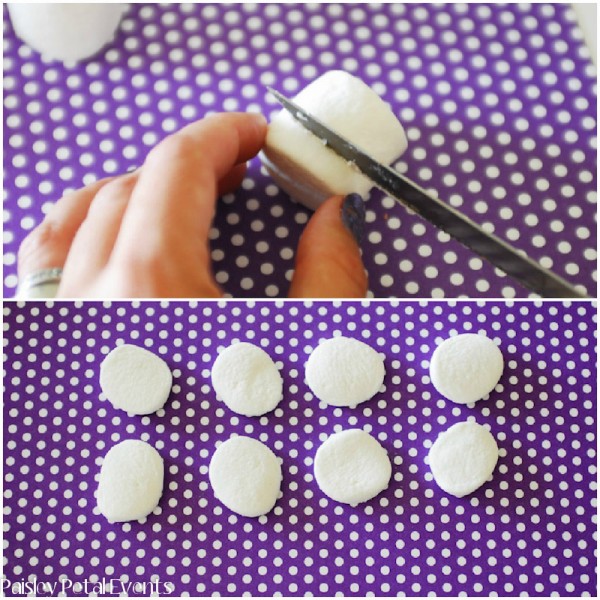
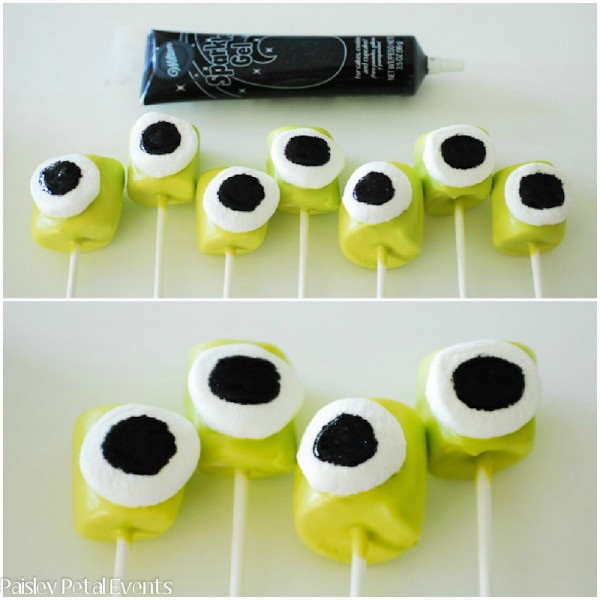
Step 2: Create the white of the eye by cutting the end off of a marshmallow.

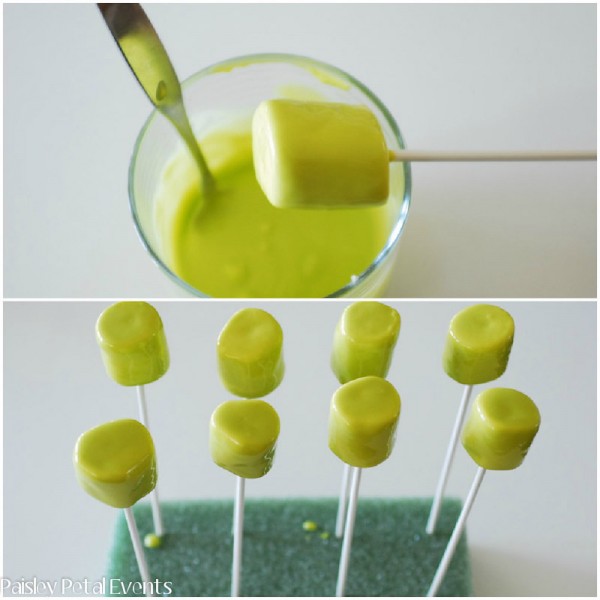
Step 3: Microwave your candy melts and dip your marshmallows into the candy, covering completely. Place in styrofoam to dry.

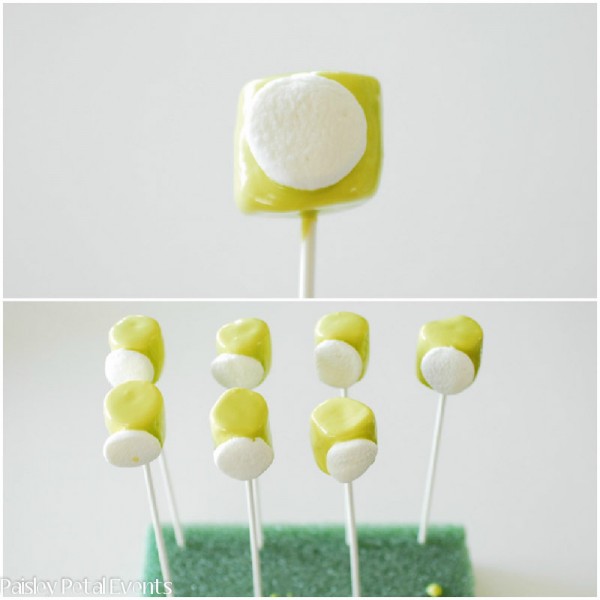
Step 4: Immediately place your marshmallow ends onto the dipped marshmallows so that they will stick to the marshmallows while drying. Let dry for approximately 30 minutes.

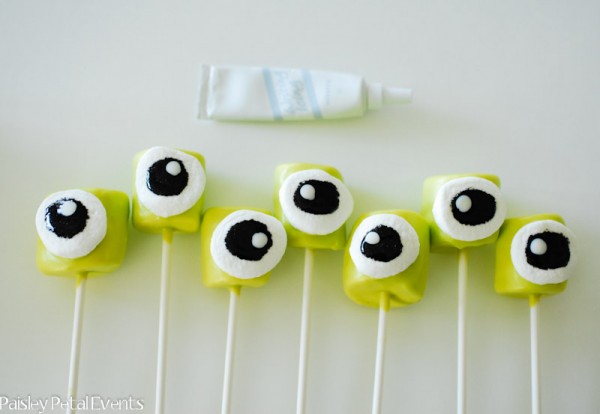
Step 5: Once your marshmallows are dry, use your black gel to draw a circle on the white marshmallow.

Step 6: Add white dot to black circle using writing or cookie icing.

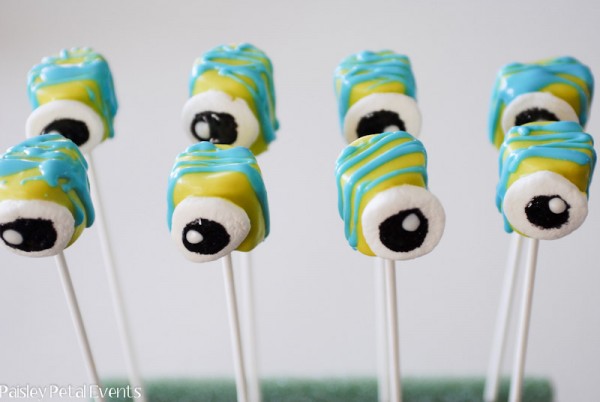
Step 7: Microwave additional colored candy melts and spoon into plastic ziploc bag. Cut off corner of plastic bag and drizzle over the top of the marshmallows.

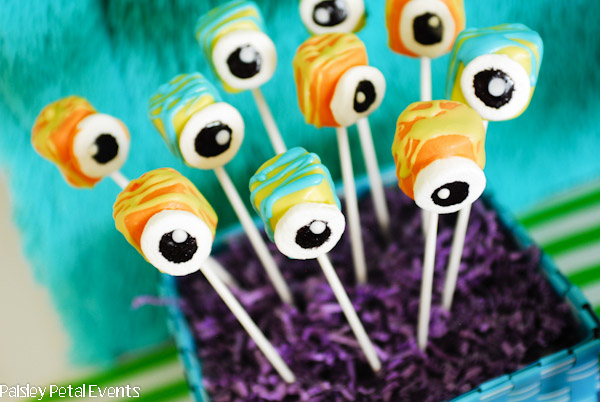
Place your monster marshmallow eyes into a cute container using styrofoam as the base to hold the marshmallows upright. Now you have a fun treat for your Halloween party! The candy melts come in lots of different colors so choose some that match your Halloween theme.
«
»

Filed Under: Halloween, Tutorials Tagged With: monster eyeballs, monster marshmallow pops, Monster marshmallows

Get all the latest

Subscribe to our newsletter to get updates on all our latest product releases, sales, and some free goodies!

Comments

  1. Natalie says

    October 17, 2012 at 8:19 am

    That’s really neat how you made the eye part from the same marshmallow! I probably would have been sitting there with hundreds of marshmallows and slicing a piece here and there. What a great idea! I also love how you got the eye to look like an eye. Too creative! Thanks for sharing!

    Reply
  2. Pamela says

    October 17, 2012 at 9:59 am

    I was just thinking this morning I needed to figure out a treat for my daughters classmates. These are absolutely perfect and will fit great upside down in my Petal boxes!! Thanks for the inspiration and fab tutorial!!

    Reply
    • Holly says

      October 18, 2012 at 12:30 pm

      Pamela, thanks so much for stopping by! I’m glad you liked the fun treat idea!!

      Reply

Trackbacks

  1. "Monster Mash" Halloween Party Ideas says:
    October 7, 2014 at 7:10 am

    […] Oh for Cake’s Sake / Laura’s Little Party, via Get Creative Juice marshmallow pops – Paisley Petal Events cookies – Li’l Luna, via Simply Sprout gumball dispenser – RV Parties, via Pink […]

    Reply

Leave a Reply Cancel reply

Your email address will not be published. Required fields are marked *

Holly headshot Holly Moeller is the founder of Paper Crush, a blog and shop dedicated to all things pretty with paper.
  • 
  • 
  • 
  • 
  • 
  • 

STAY IN THE LOOP

Subscribe to our newsletter and get updates on our newest products, sales and free printables. Get a coupon code for your first purchase!

Copyright © 2016 · Paper Crush